Chapter 5. How to install PHP-Nuke
- Table of Contents
- Installation process
- How to install PHP-Nuke through PHPMyadmin
The screenshots regarding the installation procedure, contrary to those of the other chapters, refer to the Windows platform. This is so in an effort to reduce the number of misunderstandings and ulterior help requests from the Windows community. (Judging from the feedback we receive, the Linux and FreeBSD community seem to be more able to deal with installation problems in this respect).
For the installation of PHP+ MySQL+ Apache, PHPMyAdmin etc. refer to Chapter 11 where you will find notes and links to useful tools in order to emulate PHP-Nuke on your client.
These instructions are valid for all PHP-Nuke versions up to 5,6, from 6 onwards the installation procedure will be much simpler.
Installation process
Download
Well... there is little to say here, it suffices to go to a site that holds the files and download them. There is only a small remark to make: if you use Windows and download a version comprised of a file with the ending tar.gz, do not worry, your Winzip supports it without problems. Once downloaded, extract it and "throw" all its contents in a folder you created for this purpose and you call "Nuke5" or whatever ( sites from which you can download PHP-Nuke are: phpnuke.org, www.spaghettibrain.com etc.).
Upload through FTP
Well, now what remains is just to upload the files to the interior of our main server directory that resides on our provider.
| Attention! |
It is highly recommended, prior to any installation steps, to verify that your provider supports PHP and MySQL. |
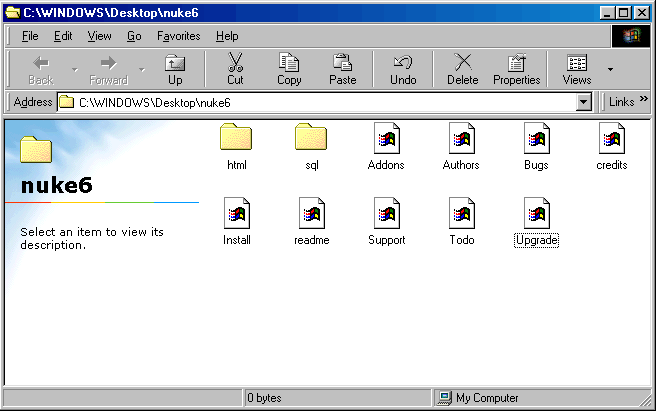
Tip: Don't upload all extracted files. After extraction, you will find a structure similar to the one depicted in Figure 5-1.
You don't need to upload all the files from the folder, in the main directory of your web presence you will only need to upload the contents of the html folder (so just do a doubleclick on the html folder and upload everything that is inside it).
Formulation of the file permissions
Important: This process only really applies if your PHP-Nuke will be installed on a Linux/Unix server, if instead you will install it on Windows operating systems you don't have to do anything.
Setting up permissions on files serves the purpose of having them execute only certain operations (write, execute etc.) when called. Setting them up correctly is important for PHP-Nuke to operate in its full functionality.
The permissions to give are the following (for the base permissions, see the Section called The permissions on the folders and files in Chapter 10 in the context of security):
Files: 666
Directories: 777
With WS_FTP you must select the files or folders on which you want to impose the permissions and, with the right mouse key, to select the option CHMOD.
Once you set up the permissions on all folders and all files, this procedure will cost you some time, but it is very important to carry out. Moreover, you will have to do it every time you insert a new file or module to your PHP-Nuke.